
Service-to-service authentication
Service-to-service (S2S) authentication allows you to connect your Business Central (BC) environment without having to make use of an account within BC, which would incur a license.
S2S requires some set up steps within Microsoft Entra ID (formerly known as Azure AD) and within your BC environment.
Set-up within Microsoft Entra ID
-
Sign in to the Microsoft Entra ID.
-
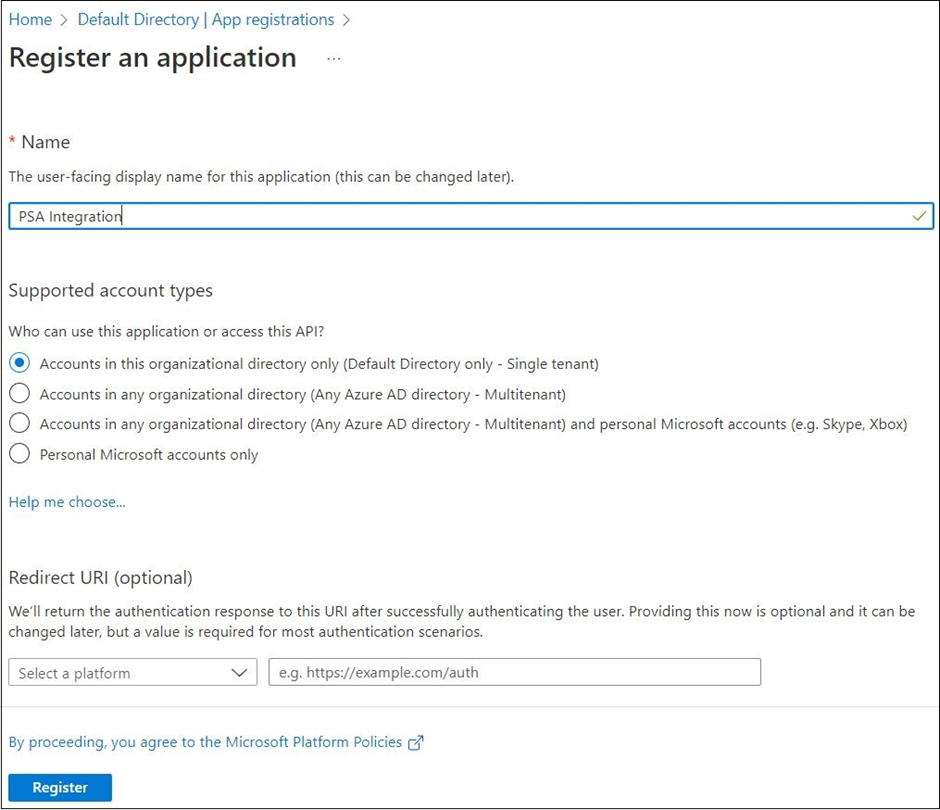
Register an application for Business Central in your Azure Active Directory tenant.
-
After you register the application, specify the following information:
o Name. A unique name for your application
o Supported account types. Select Accounts in this organizational directory only (Microsoft only - Single tenant)
o Request URI. Specify https://businesscentral.dynamics.com/OAuthLanding.htm
- After that, an overview of your application will be displayed:

The following information from this page will be required to set up the integration:
Application (client): This is the application ID that will be used as the user name.
Directory (tenant) ID: This is the ID of the Entra application used by Business Central in Microsoft Entra ID. It can be the tenant's domain name or a GUID.
-
Create a client secret for the registered application.
o Select Certificates & secrets > New client secret.
o Add a description, select a duration, and click Add.
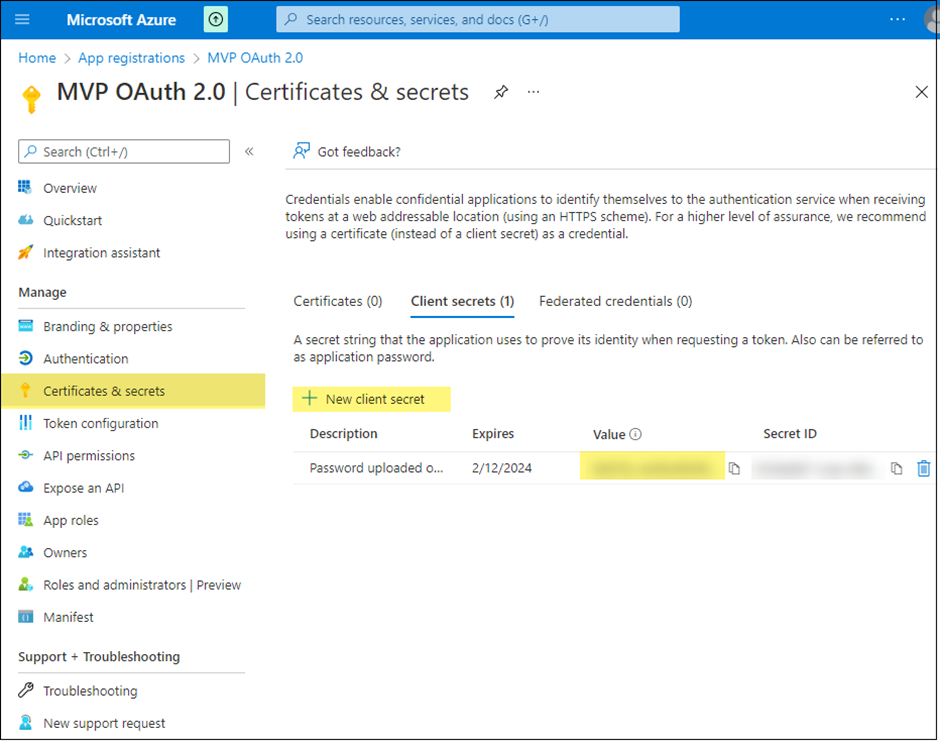
Make sure to copy and save the secret as it will not be displayed ever again. It will be used as a password in the integration.
-
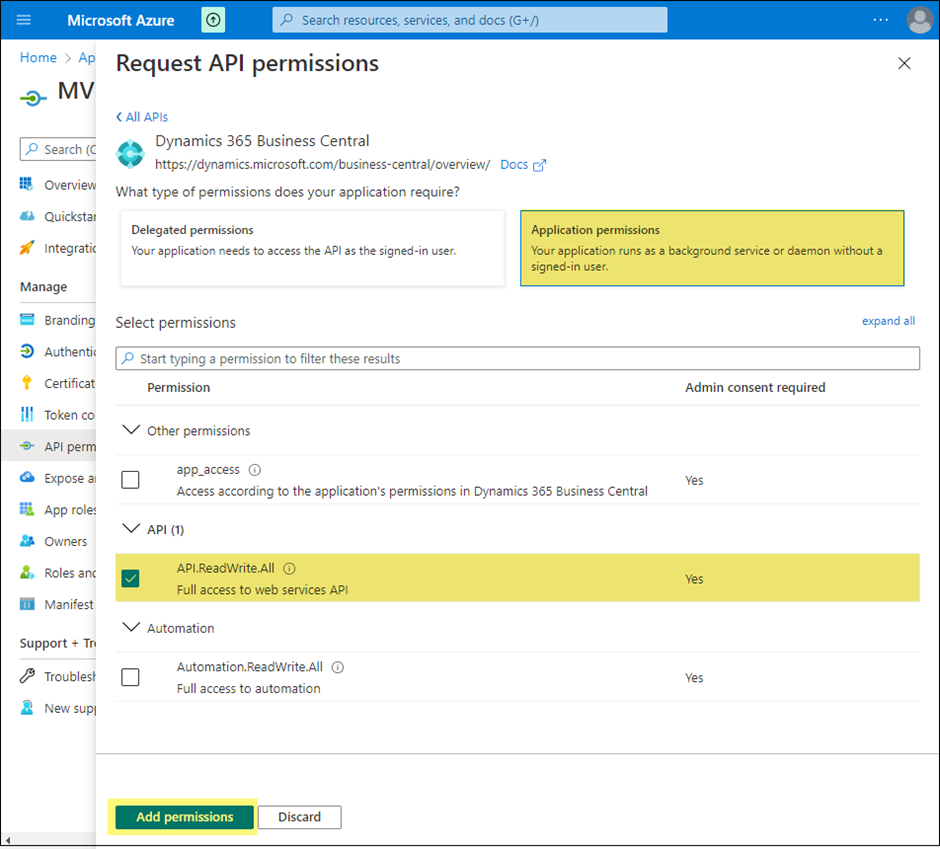
Grant the registered application the API.ReadWrite.All permission to the Dynamics 365 Business Central.
o Select API permissions > Add a permission > Microsoft APIs.
o Select Dynamics 365 Business Central.
o Select Application permissions, select API.ReadWrite.All, then select Add permissions.
If you get an error when adding the permissions, this means your account does not have sufficient permissions. Ask a person in your organization that has an account with sufficient permissions.
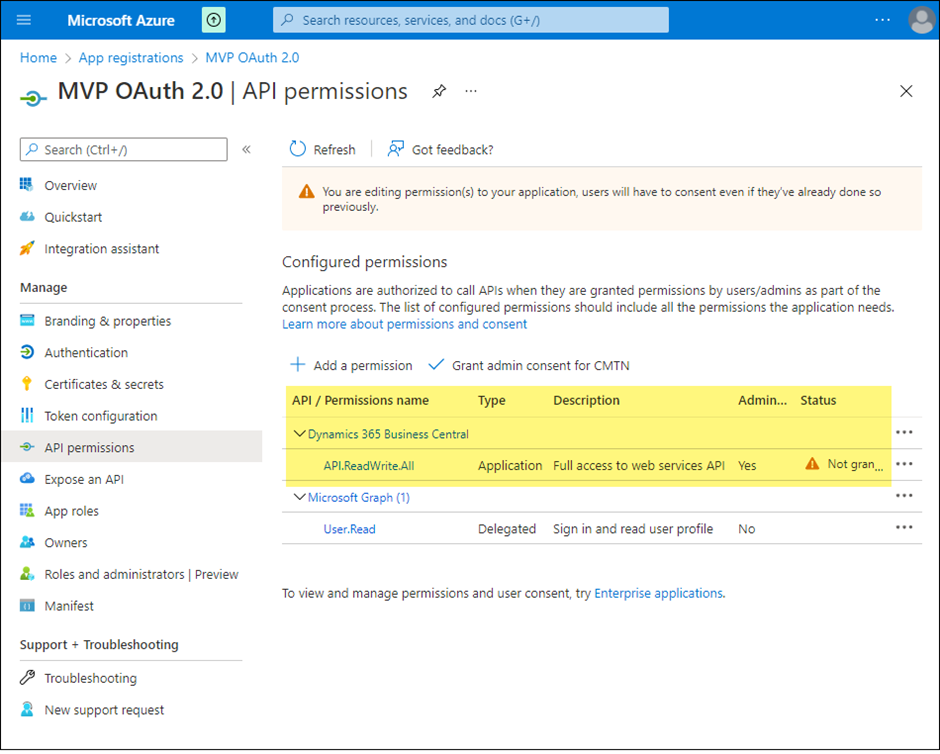
o Grant admin consent for that permission by selecting it in the list and then choosing Grant admin consent for <tenant name>.
This concludes registration of the Microsoft Entra ID application.
Configure service-to-service authentication for the Microsoft Entra ID application in Business Central
-
In the Business Central client, search for Microsoft Entra Applications and open the page.
-
Click New.
-
In the opened screen, enter the Application (Client) ID in the Client ID field. This is the Microsoft Entra ID application ID that you obtained at step 4 of the instructions above.
-
Fill in the Description field. If this application is set up by a partner, please enter sufficient partner-identifying information, so that all applications set up by this partner can be tracked in the future.
-
Set the State to Enabled.
-
Add the permission set ‘PERMISSIONSOCP’ to the app.
-
(Optional) This step is only required if you did not grant admin consent in step 6d of the instruction above. To complete this step, a redirect URL must be configured in the registered Entra ID application.
Note: If at any step you receive an error when attempting to set up the Entra application Business Central, it means that your account does not have sufficient permissions and a person within your organization or IT partner will have to set up the Entra application for you!
In the CMS:
You will have to enter the following information in the CMS under Administration -> Connector Settings:
- Client ID: from Microsoft Entra ID
- Client Secret: from Microsoft Entra ID
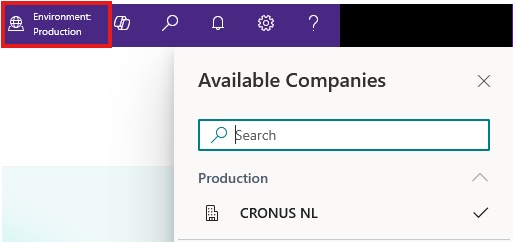
- Company name:
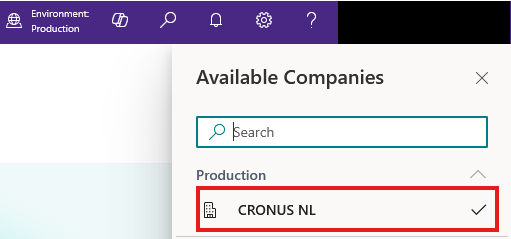
- Environment name:
- Tenant domain: from Microsoft Entra ID
- Scope: (typically:https://api.businesscentral.dynamics.com/.default)
- Core-Sales BC extension version: 2.0
The customer needs to authorize so we can retrieve the correct company ID from MBC.
Updated 9 months ago